24/08/2017

Super easy houmous

There's no two ways about it. Houmous is good. It's good to taste and it's good for you. The chickpea (or Garbanzo bean) is a legume of the family FABACEAE (hence the name of the chickpea water Aquafaba). Chickpeas are naturally high in fiber and protein and are great for digestive health since they regulate blood sugar levels.
There are all sorts of houmous in the UK... not so much in France... And there's usually dairy in it for some reason.
It is originally from the Middle East and in fact, the word hummus means chickpea in Arabic. 

Houmous makes a great sandwich base but can also be eaten with a salad, spread on nice bread or used as a dip with raw vegetables or tortilla crisps.

INGREDIENTS:

200 g cooked chickpeas (rinsed and drained)
2 tablespoons aquafaba
1/2 lemon juice
2 tablespoons lime
1 small clove of garlic, chopped
2 heaped tablespoons tahini
1 teaspoon paprika
2 tablespoons olive oil
Himalayan pink salt and pepper to taste

METHOD:

Put all ingredients in a food processor and mix! :)
Pulse a few times to get a really smooth paste.
Optional but recommended: Drizzle some olive oil and sprinkle some paprika on top.
Transfer to a glass jar and store in the fridge up to 5 days.

15/08/2017

Green Olive Tapenade without capers or anchovies

I love olives. Raw or cooked, I love them. Specially green ones. When I first tasted Tapenade which is basically olive paste, I thought I would love it. Wrong!!! I found it way too salty and sickening. Looking at the ingredients, I noticed that there were capers in it which I don't like. You can even find anchovies in it sometimes but having been a vegetarian for years (before being a vegan) I obviously never tried that one.
Olives are great for us Endogirls. They are full of healthy fats which we need in order to improve hormonal balance overall.
Before the holidays, my better half came home with a giaaant jar of olives from the market. As much as I love them, I wasn't really sure what to do with them all. He suggested we make Tapenade :)
We came up with a recipe right there and then. Below is our own version of Green Tapenade, all Endo approved. Keeps in the fridge for up to 4 or 5 days... If it lasts that long :)


INGREDIENTS:

(For a small jar)
220 g green olives
1 small garlic clove, finely chopped
1 tablespoon nutritional yeast
3 large basil leaves or 6 small ones
1/2 lemon juice
3 tablespoons virgin olive oil
Freshly ground black pepper to taste

METHOD:

Put your olives, nutritional yeast and lemon juice in a food processor and mix until finely chopped. Add the garlic, basil leaves and olive oil and mix again until you get a paste. Pulse as much as desired depending on the consistency you like. I think the smoother the better. Add black pepper to taste.
Transfer to a jar and keep in the fridge.
Spread on toasted baguette.

03/08/2017

Gluten free Granola

I was brought up on continental breakfast. Bread, butter, jam, a mug of hot cocoa, a glass of freshly squeezed orange juice and a yogurt. Everything was either home made (my father was an Artisan Baker) or organic directly from the farm which I thought was good at the time. I never really questionned it. I was brought up this way, so were my parents and grandparents (although times were extremely tough during the war and they would eat whatever they would put their hands on but that's another story).
I also had severe anemia growing up which is a decrease in the total amount of red blood cells you have in your blood. I suffered from iron deficiency for a long time. I would lose a lot of blood every month. The family doctor always told me it was normal, that my pain was normal, that it was part of growing up... Again, I never questioned his diagnosis. I mean, he was a Doctor! I was put on iron pills for years and took them religiously. I developed other symptoms because of them but I'll explain that in another post.
Coming back to breakfast, it took me a long time to try and taste and find out what I liked and what was actually good for me. You hear all sorts of things about breakfast : "it's the most important meal of the day, you should drink a hot beverage and eat carbs and dairy, you should eat a lot at breakfast that will sustain you til noon" etc etc....
I feel it is really up to everyone to find out! I believe in fasting once in a while (which is what you do during your sleep for hours anyway) so if you are not hungry in the morning then ...don't eat! Don't force yourself. Have some nuts and fruit at hand for later when you do get hungry. I love porridge during the winter months but for a few months now, I've been loving my homemade Granola.
Homemade Granola is the best. Specially when you can make it gluten free and with bits and bobs that you like. Then the one recipe that you have has endless possibilities.
Below is the version that I like best at the moment, on top of a mashed banana. I hope you get to try it!


Makes a whole tall Mason jar

INGREDIENTS:

1 cup of organic rolled oats
1 cup of millet flakes (if you don't have any, use unsweetened rice puffs or just go with 2 cups of rolled oats)
3 Tablespoons of melted organic coconut oil
2 Tablespoons of organic raw cacao
1 teaspoon of vanilla extract
1 handful of raw almonds
1 handful of raw hazelnuts
1/3 cup Goji berries
1/2 cup of unsweetened dry raisins or sultanas

METHOD:

Heat up the oven to 180° C. Cover a baking tray with some parchment paper.
In a large bowl, mix the oats, millet, cacao, almonds and hazelnuts together with the oil and vanilla extract. Mix until everything is well coated in oil.
Pour onto baking sheet and spread evenly.
Bake for about 15 to 20 minutes.
Take out of the even and let cool.
Once the mixture has cooled down, throw the raisins and the goji berries in there.
Fill the jar and you're good to go!


30/07/2017

Nectarine Oat Bars

I'm loving nectarines right now :) They're gorgeous, juicy and in season so what's not to like? For this recipe, I got my inspiration from a recipe from Thug Kitchen and their strawberry bars. I've changed a few things - mostly replace the brown sugar with more naturally sweet ingredients I really like and tolerate better. So here we are. It is DELICIOUS, keeps up to 5 days in the fridge - if it does make it that long - it never does in my household!


Makes 12 bars:

Ingredients for the filling:
6 organic nectarines
1 tablespoon lime juice
1 teaspoon vanilla extract
1 tablespoon maple syrup

Ingredients for the base:
2 cup rolled oats
2 heaped spoons of nut butter of your choice (I used almond/hazelnut and cashew)
2 heaped tablespoons of softened coconut oil
1 teaspoon baking soda
1 tablespoon maple syrup
6 pitted Medjool or Deglet Noor dates

Method:
Line a rectangular baking dish (mine is 17 X 27cm) with baking paper and grease it a little with coconut oil. Heat up your oven to 180° C.
Dice up the peaches, getting rid of the pits. Mix with the lime juice, vanilla and syrup and set aside.
In a food processor, mix the oats, nut butter, coconut oil, baking soda, syrup and dates until it forms a sort of crumble.


Press the mixture into the dish quite firmly. You can save a little to put on top later. Pour out the juice made by the nectarines (you can drink it later or use it in a smoothie) and press the fruits gently into the crumbly mixture. Top with the rest of the crumble and a handful of sliced almonds (optional).
Bake for about 40 minutes until the top or/and almonds becomes golden brown. Cool completely before cutting into slices. (I love them straight out of the oven!) Store in the fridge.


03/07/2017

Apricot, almond and basil tart tatin (vegan and GF)

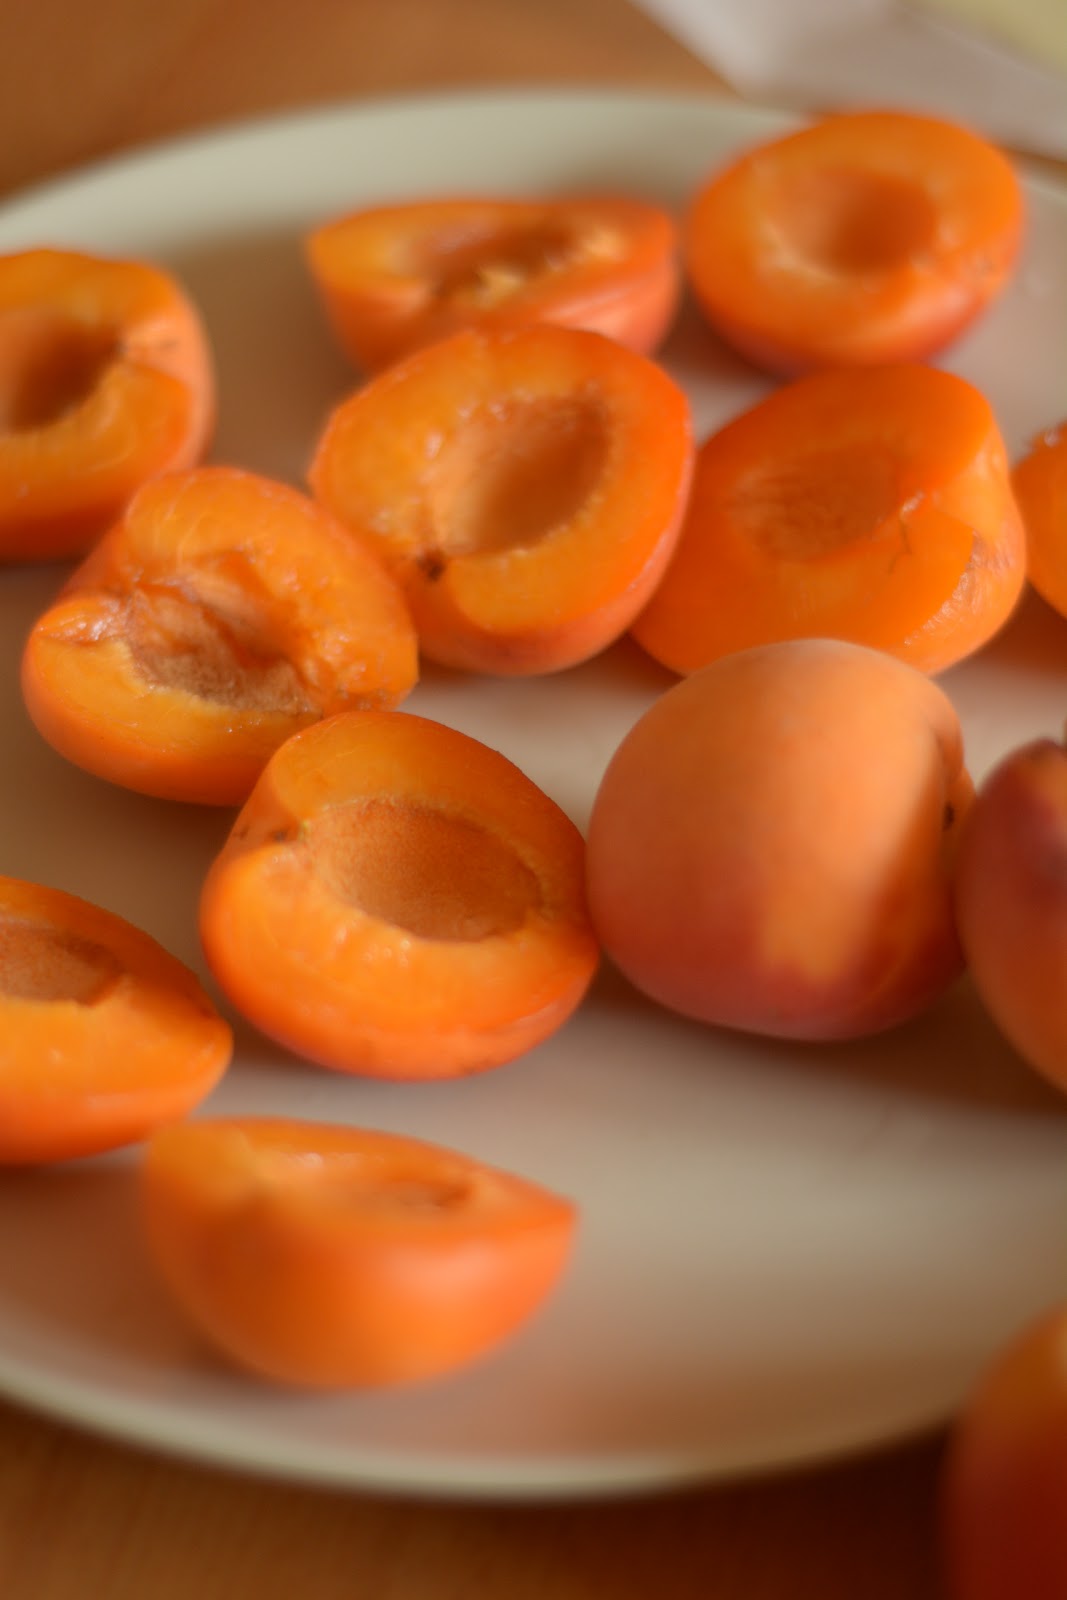
I haven't posted in ages. I have been studying and travelling and exploring and studying some more. I'm back in France for the summer and since gorgeous, juicy summer fruits are in season, I thought I would whip up a nice Tarte Tatin. An apricot and almond Tarte Tatin. I mean look at these beauties I got from the farmers market! Also, there is nothing easier than this recipe! The only difficult thing is that if you want to make your puff pastry YOURSELF. There are endless recipes on Google or YouTube, vegan or not, gluten free or not, take your pic. Mine was organic, vegan and gluten free. A shortcrust would work fine too. Every time I eat this tart, I feel like I'm on a holiday in Provence, in the South of France, at a sunny terrace, listening to the gentle breeze and singing cicadas. So give it a try and let me know how you liked it :-)


Ingredients for 6 people :

1 organic GF puff pastry
7 ripe apricots
2  big TBS almond meal
1 big TBS vegan butter
2 TBS brown sugar or demerara sugar
For the decoration:
1 handful of sliced almonds
A few basil leaves

Method:

Preheat the oven at 180° C. In your tart tin, spread the vegan butter and sprinkle the sugar on top. This will create a bit of a syrup. Sprinkle the almond meal over it. Take your apricots halves and place them in the tin rounded side down.


Roll out your puff pastry and place it gently over your apricots. Press down on the sides.


Bake until it is puffed and a nice shade of golden brown. Mine took about 20 minutes.


When golden brown, let cool for a couple of minutes. Put a plate or dish tightly over it and invert so that your tart and syrup fall onto the dish.
Sprinkle the sliced almonds and basil leaves on top. You can serve cold or warm with some vegan ice cream (will post a recipe soon). I hope you enjoy it as much as I did!


17/12/2016

No-bake choconut balls

Last week I talked about the lovely coconut balls I made that could easily replace your standard truffles. This week, I want to talk about another version that I've made with hazelnuts. And they are the BOMB! They ressemble the Ferrero Rochers that I used to loooove but can't have anymore *sigh* because of endo. These are dairy/soy/palm oil and gluten free! What else do you want? 
(I made it again today with hazelnuts and almonds and it was gorgeous)


INGREDIENTS:
(for about 20 mini balls)

1 cup of hazelnuts
2 Tablespoons of hazelnut oil
1 Tablespoon of organic pure raw cocoa powder
3 Tablespoons of maple syrup
2 Tablespoons of coconut cream
1 Teaspoon of vanilla extract

METHOD:

Preheat the oven to180° C (360° F)
Arrange the hazelnuts on a baking sheet and roast for about 10 minutes until golden brown. Stir them every four minutes or so. Let them cool for another 10 minutes.
You will need to skin them. I usually transfer them into a bowl, put a plate over it and shake energically.
Separate the hazelnuts from their skin and transfer them into a food processor. Grind them until finely chopped. Scoop out 1/4 cup of the nuts onto a plate and save for later.

Back to your food processor, add the oil, the cocoa powder, the vanilla, the syrup and the coconut cream to the rest of the nuts. Pulse until you get some sort of paste (you might want to scrape down the sides a couple of times).

With a teaspoon take some of the mixture (the size of a small walnut) and press firmly in your palm to start shaping a small ball then roll it into the remaining chopped hazelnuts. 

Put them on a plate or tray and refrigerate for at least a couple of hours. Enjoy!


11/12/2016

No-bake vegan choc' coco balls

With Christmas coming up, let's talk about chocolate truffles. Yes they are lovely and very chocolatey but they are also high in fat and can quickly become sickening. As an Endogirl, I can't have dairy or refined sugar so these are an UH-mazing alternative!

Today I made these beautiful vegan, gluten-free and most importantly guilt-free chocolate and coconut truffles. They are yummy and light and perfect for a quick dessert or just a chocolate craving. I mean just look at' em beauties!


INGREDIENTS:
(for about 10 small balls)

1 1/2 mug of shredded coconut
2 Tablespoons of coconut cream
1 Tablespoon of raw unsweetened cocoa powder
2 Tablespoons of melted coconut oil
3 Tablespoons of maple syrup
1 Teaspoon of vanilla extract
1 pinch of Himalayan or Guerande salt

METHOD:

In a food processor, mix 1 mug of shredded coconut (keep the rest for later), the melted coconut oil and the cocoa powder until well combined. You may want to scrape down the sides a couple of times.
Add the coconut cream, vanilla extract, maple syrup and salt. Mix again until you get a paste.
Place the remaining shredded coconut on a plate, shape the paste into small balls and roll them into the coconut.
Refrigerate for one hour minimum. They will be perfect after a few hours in the fridge. Enjoy!


06/12/2016

This is my story.

Hello I'm Isabelle. I'm glad you found me. It's taken me years to get here. Questions such as "Can I do this?" "Is my story worth it?" "Can I make a difference?" were always popping in my head.... So what's changed you may ask? Well.... I did! I also got a gentle push from my friends and family. I have a story to tell that will hopefully help or inspire women like me as well as mothers, sisters, nieces, aunts and friends. And we ALL matter.

In my mid twenties, while I was living in the UK, I was diagnosed with an auto immune disease I'd never heard of and knew nothing about: Endometriosis ... (Adenomyosis & Fibromyalgia came later). It took 14 years and 8 doctors. I had an operation, the surgeon removed very extensive Stage IV Endo that had spread to my ovaries, Fallopian tubes, kidneys, lungs and diaphragm) then gave me a Zoladex shot for the next 6 months and told me I would be fine ... I didn't question... I trusted the doctors somehow.

Since I first got my period as a young girl. I was told by doctors that the pain I was feeling was normal, that my body was changing, that it was part of being a woman, that I had to take paracetamol and rest and that I'll get better soon.  As the pain got worse and worse and as I visited many doctors' practices, I realised doctors didn't actually KNOW what was wrong with me. Many of them told me that l should be stronger and take more pain killers, some doctors even told me it was all in my head! I missed a lot of school and social events and had countless doctor's notes to skip PE.

Over the years I've had several surgeries (five to this day) and every time, I got a 6-month round of either Zoladex or Decapeptyl injections. I took many painkillers .... different types, sizes, colours... and I just got on with my life. When as a young girl you are told that something is normal, well, you start believing it and you keep going, trying to live your life the best you can. The pain was so horrible most times I couldn't even walk or move.
It was like someone was reaching inside my belly, grabbing/pulling/stabbing my insides. I would cancel social plans and spend days in bed with excruciating pain,  throwing up, sometimes blood, getting awful unbearable migraines and honestly... I thought about jumping out the window many times and hurting myself so it would stop once and for all. Heavy medication at that time was my best friend. I was addicted (even though sometimes it wouldn't help). I then developed a pretty high pain threshold and this became my life. I was alright as long as my pockets were filled with lots of opium-based medication.

Last year however, my pain reached a new level of hell. I collapsed at work on Christmas Eve morning and was rushed to the ER. Doctors found a couple of tumours filled with blood one being the size of a grapefruit in my belly.  It was grabbing at my ovary and Endo had spread to the rectum and bowels. We scheduled the operation after the holidays but my body decided otherwise. At the beginning of January, I was rushed to hospital again and had an emergency operation. I started bleeding internally and the tumours were ready to burst. I nearly passed on the table. Surgeons removed the tumours, Fallopian tubes and one and a half necrotic ovaries in torsion. However they couldn't get to the ones near the rectum.

I was given shots of Decapeptyl for months. It only masked the pain and disease and the side effects slowly killed me. Chemo drugs will do that to you: Sleepless nights, hot flashes, night sweats, chills, constant muscle and joint pain, migraines, dizziness, nausea, bone issues, memory problems, joint swelling, blurred vision, hair loss.... I knew these symptoms all too well from the previous shots I had been given years before. I felt terrible and lonely and empty and really not a woman anymore. I was slowly sliding into depression.
The thing is... you can explain your pain but you cannot share it. People around me were either in denial or worried or felt helpless, doing the best they could. One painful evening, I reached out on Instagram and the response I got was unexpected and overwhelming. I found a community out there of women seeking help and support too. I was not alone anymore and it helped me a great deal.

However I was still in pain. Just before the summer of 2016, I was so on the edge that I decided to take the matter into my own hands. I switched to a whole foods diet, (cheese was my frenemy at the time), I educated myself more on my illnesses and sought a more natural treatment with the help of a homeopath. I also tried pain and heat management as well as acupuncture.

Five months later, I am 100% medication free and much happier, considering. I take natural supplements that help with the pain and my estrogen levels.
It is still painful but I do have some pain free or low pain days. I had to cut out many food groups, changed my lifestyle and gathered information on Endo because my body deserves it. I deserve it. I want to feel better without popping pills or having injections all the time. Hormones messed up with my body big time, I will not do that again if I can help it.

This blog is about my invisible illnesses, this corner of my life that you can't see unless I talk about it. And it is high time that we as women spoke up and raise awareness.
I will share healthy and anti inflammatory recipes here as I love to spend time in the kitchen creating/adapting recipes that are Endo and Fibromyalgia approved.

I hope you enjoy it. Meanwhile let's keep fighting... together :-) Thanks for taking the time to read this.
(December 2016)


05/12/2016

Vegan and Gluten Free waffles

When I had to cut out gluten from my diet, it was very hard at first. I realized I would have to stop eating a lot of things I liked. Good things like pizza, bread, pasta.... oh, and waffles!! I couldn't say good bye to waffles!
It took me a couple of tries to get these babies exactly the way I wanted them to be: Crunchy on the outside and light and fluffy on the inside. I am so happy to say that these waffles are absolutely delicious. And the batter takes less than ten minutes to make! I hope you get a chance to make them and enjoy them. Let me know what you think in the comments below.


INGREDIENTS: 
(for a dozen of small round Belgian style waffles)

1 mug of chickpea flour (buckwheat works great too)
1/2 mug of rice flour
2 tablespoons of raw cane sugar
1 mug of warm almond milk 
3 tablespoons of melted vegan butter (or coconut oil)
1 tablespoon of vanilla extract
1 pinch of salt
1 teaspoon of baking powder

METHOD:

Whisk together the flours, sugar, salt and baking powder. Add the melted butter then the lukewarm milk and vanilla extract. Stir well until combined.
Preheat your waffle maker and cook as directed in the manual.
Enjoy with maple syrup, raw honey or fruit and marmelade. Bon appetit!
(If there are any left (which is NEVER with me) you can easily pop them in the toaster to heat them up)


POSTS THAT YOU LIKE THE MOST