Showing posts with label lifestyle. Show all posts

09/04/2019

Curly hair routine

It is always a surprise when people ask me about my hair. I was regularly made fun of at school because I stood out in the middle of an ocean of straight and thin hair. It affected my confidence growing up and of course I ended up straightening it chemically to blend in until I realised, years ago, that it was time to embrace what I was given and that I was, in fact, very lucky to have something different and beautiful. 

There are many methods out there for curly hair ... If you go on Google or YouTube, you will find endless articles and videos. Now, let's be clear, I am not a beauty blogger ... but I do love health and this is just what I do for my hair to be healthy. 

The most important thing is to know what hair type you have.  Mine is dry and curly (type 3B/C) and I have A LOT of it! I probably get that from my Italian side... thank you Dad! haha


I tend to use natural and organic products as much as possible. I deep condition once a week every week the day before I wash my hair. I'll use a generous amount of softened or fractionated organic coconut oil in my hair and leave it on overnight as a mask then put my hair up in a loose bun before going to bed. (Protect your pillow but covering it with a microfibre towel).

The next day, I either use a solid shampoo bar or a moisturising paraben and silicon free shampoo. I love SHEA MOISTURE products but they do not have a lot of plastic free options yet. I try to live plastic-free as much as I can these days and I'm probably about 80% at the moment. (The rule is to finish everything I own right now and never buy anything plastic again). I love LUSH products for that. 

I rinse out the shampoo, then apply a solid conditioner bar or a coconut based conditioner throughout until my hair is well coated and I get a good slip. I flip it over and brush it through. I rinse it out and coat my hair again with the same conditioner.

This is where my routine may differ. I do NOT rinse out. I brush it thoroughly then apply a good amount of water based gel with prayers hands then I scrunch my whole head (it should make a squishy noise).

I put my hair in a micro fibre towel and leave it on to soak up the excess moisture for about 10 to 15 minutes. I then diffuse on cool air until my hair is dry. If I have time, I let it air dry but I find that my curls are always more defined with the diffuser.

At night, I put my hair up in a messy bun when I go to bed and just refresh my curls in the morning with a water spray and lavender and rosemary essential oils (I use DoTERRA) or a little leave-in SHEA MOISTURE conditioner.


It takes a while to find a routine that suits you so don't be shy to experiment. Let me know how you get on. For me, it is all about hydration and hold. What about you?

PS: This post is not sponsored. I just genuinely like and use these brands. 


10/03/2018

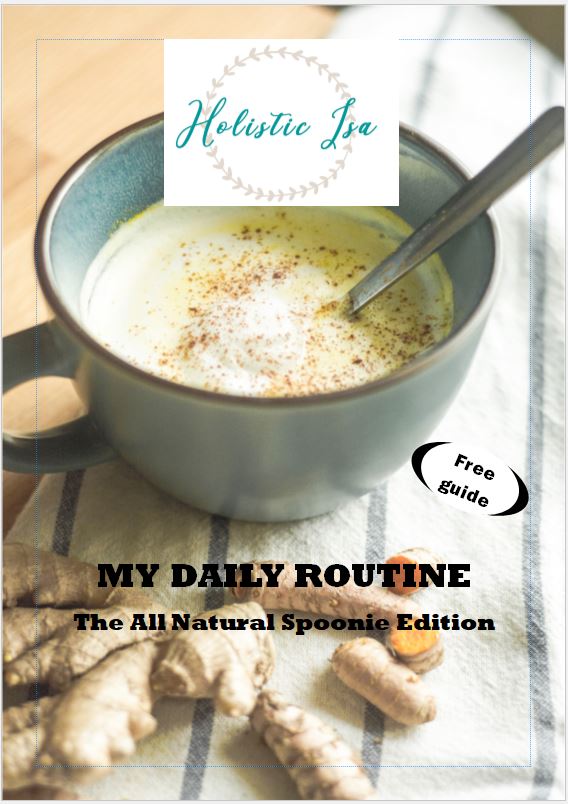
FREE GUIDE FOR SPOONIES : My daily routine

Hi everyone,

It is here! Finally (and for EndoAwarenessMonth nonetheless)! I have been working on this guide for a while now and between spoonie life, normal life, tech issues and the rest, I am so happy that it will now get to do its own thing out in the world.


This guide is about my daily routine using only holistic ways. It has 15 pages full of health tips and 3 brand new recipes which I hope will inspire you to find your own routine and make your chronic pain a little more bearable. As a thank you for having been a big support the last few months, I'm gifting it to you all for FREE. :-)

I believe YOU have the power to heal yourself and that it is important to share our knowledge to end our suffering.

I'm currently working on a cookbook with more anti-inflammatory recipes and natural health tips. I will keep you posted when it comes out.

In the meantime I hope you enjoy this free guide! Let me know how you like it and feel free to share #holisticisa on social media if you use the tips or make the recipes.

Enjoy sweet spoonies and have an amazing day!
xo

Enter your name and email on my homepage or click right here 


22/01/2018

How and why I went vegan

A few weeks back, a few people asked me over on Instagram how and why I went vegan last July. I will mostly talk about the "how" in this post as I feel the "why" is personal to each and everyone of us. My "why" was a combination of health, illness management, my love for all animals, research on how they are treated and slaughtered as well as our planet and environment.


The "How" however is not that straightforward. I was a vegetarian for most of my life. Truth is, I've never liked the texture of meat (red, white, game or poultry). Too dense, too chewy, it was not really my taste.

CHILDHOOD...
Growing up, my parents raised me an omnivore. All organic food, straight from farmers and local markets. My father was an artisan baker (making sourdough bread and pastries in an wood-fired oven, something you do not see anymore nowadays). At the end of every other business day, he would trade dry or unsold bread with farmers who wanted animal feed, for eggs, poultry or milk.

We always had fresh milk, sour cream, cheese, organic free range eggs etc on the table. I would take a long time to finish my plate every time meat was on the menu. I would chew for hours (not kidding), finding it hard to swallow and if I didn't finish my lunch I would get the leftovers for dinner. Ugh. (The day we got a dog was a day filled with joy of course ... but it also meant that I could discreetly feed her the meat I could not eat under the table ;-))

THE FRENEMY......CHEESE...
Along the way and in no particular order I gave up most dairy, refined sugar and had a love-hate relationship with eggs. I also gave up fish 6 years ago. I even went vegan for a while in 2016 (truth: I cheated a little every month coz ...well, he following culprit)... cheese (mostly goat's cheese). This was why I never went fully vegan for more than a few weeks. I LOVED cheese. On pasta, on pizza, on crackers, on a platter with wine, cheese was my go-to snack. However, every time I had some, I would feel bloated afterwards, heavy and gassy (well, sorry but you've got to talk about this stuff!)
Many times I went off it but after a few days or weeks even I would always find my way back to it. It was like I was addicted (but later on that).

What got my attention was that every time I stopped eating cheese, I would feel much better and my gut was healthier. I won't go in depth into my health problems here but not eating cheese and dairy (even for a few days) seemed to have a positive effect on my gut, migraines and overall body. No inflammation! Also let's be real, there was no vile smell in the fridge! (Don't forget I live in France eh, stinky cheese and all....) Yet, I was too weak to give it up.

RESEARCH...
So I educated myself, did some research, watched videos and documentaries, read studies and I found out that there is a protein in cheese called casein which is highly addictive. Many doctors have conducted studies which prove that casein is slowly digested and once it enters our bloodstream, it releases heroin-like substances and causes severe addictions to cheese and dairy products. It is that strong. And as women, it also affects our mood and hormones.

After reading more and more about it, I decided to give it up for good. That was in July 2017. The first few days/weeks were hard. I was craving cheese big time. But I remained strong and turned to nuts and fruits and I even began making my own vegan cheese. About 4 weeks later, I weaned off of it. I was no longer craving it and having read studies and watched graphic images of how animals are treated, something clicked in my brain. I could not eat that stuff ever again. Not only for the animals but also for my health.

We've been brain-washed about the fact that we need dairy to get our daily dose of calcium. When you think about it, why not go straight to the source? Why get it through an animal? Just start eating more leafy greens, nuts, legumes or take supplements (which is also what is given to animals in the first place). And take vitamin supplements like B12.


TRANSITION... 
Cooking and preparation wise, my transition to being completely vegan was not a big change from being a vegetarian... I just needed more ideas. I found other go-to snacks.
To be honest, it doesn't take very long to prepare meals.... and I am not a professional chef. You just need to change the way you shop and have staples in the house at all times.
For instance, in your pantry, you should always have brown rice, lentils, beans, chick peas, coconut milk/cream, lots of spices and herbs, nuts, Medjool dates, pasta (Gluten free if you can), you can also try quinoa, millet, couscous etc... That will be your big shopping for dry ingredients.
Every two or three days, you can shop the fresh stuff like fruits and vegetables (exotic fruits, avocados, pineapples and seasonal fruits and vegs etc). The point of going plant-based is for you to eat fresh, whole, colourful and seasonal produce.

Once you become more familiar with vegan cooking, everything will fall into place. And don't believe we only eat leaves and salads!! Being a vegan can be a feast! You can have burgers, lasagna, dahls, curries, pizza, pasta, stews, stir-fries, French fries, pies, soups, anything you want, except much healthier and probably more exciting, as once you start cooking, you will become more creative and start experimenting and find new flavours. The important thing is that you get excited about the food.

DON'T GET OVERWHELMED, TAKE YOUR TIME.
If you want to transition but are not too sure how, take baby steps. Give yourself time. It is better to do it gradually than to feel overwhelmed and give up. And most of all, stop buying processed foods and prepared meals, even vegan ones! Being plant based to me is all about whole foods, I would not want to eat something full of refined sugar, salt or fat or that I didn't make myself. It is so quick to throw a good whole foods tasty meal together. That's what veganism is to me. Whole foods that keep you fuller longer.
If you need inspiration, I hope you can find it on this blog where I regularly post yummy and easy to make recipes. There are also great blogs and websites out there to get you started.

I am by no means an agressive vegan. The above is my own experience and opinion. I think it is okay that people do whatever they want to do. To each their own. I only hope that I can inspire someone to take a moment to think about it or research it or educate themselves before they make their final choice. Specially if you suffer from chronic pain, an auto immune disease or if you just want to lose weight and be healthier. 

It has worked for me so, why not you? Just have fun with it :)


17/12/2016

No-bake choconut balls

Last week I talked about the lovely coconut balls I made that could easily replace your standard truffles. This week, I want to talk about another version that I've made with hazelnuts. And they are the BOMB! They ressemble the Ferrero Rochers that I used to loooove but can't have anymore *sigh* because of endo. These are dairy/soy/palm oil and gluten free! What else do you want? 
(I made it again today with hazelnuts and almonds and it was gorgeous)


INGREDIENTS:
(for about 20 mini balls)

1 cup of hazelnuts
2 Tablespoons of hazelnut oil
1 Tablespoon of organic pure raw cocoa powder
3 Tablespoons of maple syrup
2 Tablespoons of coconut cream
1 Teaspoon of vanilla extract

METHOD:

Preheat the oven to180° C (360° F)
Arrange the hazelnuts on a baking sheet and roast for about 10 minutes until golden brown. Stir them every four minutes or so. Let them cool for another 10 minutes.
You will need to skin them. I usually transfer them into a bowl, put a plate over it and shake energically.
Separate the hazelnuts from their skin and transfer them into a food processor. Grind them until finely chopped. Scoop out 1/4 cup of the nuts onto a plate and save for later.

Back to your food processor, add the oil, the cocoa powder, the vanilla, the syrup and the coconut cream to the rest of the nuts. Pulse until you get some sort of paste (you might want to scrape down the sides a couple of times).

With a teaspoon take some of the mixture (the size of a small walnut) and press firmly in your palm to start shaping a small ball then roll it into the remaining chopped hazelnuts. 

Put them on a plate or tray and refrigerate for at least a couple of hours. Enjoy!


11/12/2016

No-bake vegan choc' coco balls

With Christmas coming up, let's talk about chocolate truffles. Yes they are lovely and very chocolatey but they are also high in fat and can quickly become sickening. As an Endogirl, I can't have dairy or refined sugar so these are an UH-mazing alternative!

Today I made these beautiful vegan, gluten-free and most importantly guilt-free chocolate and coconut truffles. They are yummy and light and perfect for a quick dessert or just a chocolate craving. I mean just look at' em beauties!


INGREDIENTS:
(for about 10 small balls)

1 1/2 mug of shredded coconut
2 Tablespoons of coconut cream
1 Tablespoon of raw unsweetened cocoa powder
2 Tablespoons of melted coconut oil
3 Tablespoons of maple syrup
1 Teaspoon of vanilla extract
1 pinch of Himalayan or Guerande salt

METHOD:

In a food processor, mix 1 mug of shredded coconut (keep the rest for later), the melted coconut oil and the cocoa powder until well combined. You may want to scrape down the sides a couple of times.
Add the coconut cream, vanilla extract, maple syrup and salt. Mix again until you get a paste.
Place the remaining shredded coconut on a plate, shape the paste into small balls and roll them into the coconut.
Refrigerate for one hour minimum. They will be perfect after a few hours in the fridge. Enjoy!


05/12/2016

Vegan and Gluten Free waffles

When I had to cut out gluten from my diet, it was very hard at first. I realized I would have to stop eating a lot of things I liked. Good things like pizza, bread, pasta.... oh, and waffles!! I couldn't say good bye to waffles!
It took me a couple of tries to get these babies exactly the way I wanted them to be: Crunchy on the outside and light and fluffy on the inside. I am so happy to say that these waffles are absolutely delicious. And the batter takes less than ten minutes to make! I hope you get a chance to make them and enjoy them. Let me know what you think in the comments below.


INGREDIENTS
(for a dozen of small round Belgian style waffles)

1 mug of chickpea flour (buckwheat works great too)
1/2 mug of rice flour
2 tablespoons of raw cane sugar
1 mug of warm almond milk 
3 tablespoons of melted vegan butter (or coconut oil)
1 tablespoon of vanilla extract
1 pinch of salt
1 teaspoon of baking powder

METHOD:

Whisk together the flours, sugar, salt and baking powder. Add the melted butter then the lukewarm milk and vanilla extract. Stir well until combined.
Preheat your waffle maker and cook as directed in the manual.
Enjoy with maple syrup, raw honey or fruit and marmelade. Bon appetit!
(If there are any left (which is NEVER with me) you can easily pop them in the toaster to heat them up)


POSTS THAT YOU LIKE THE MOST